I created an interface object called language which has id and name properties.
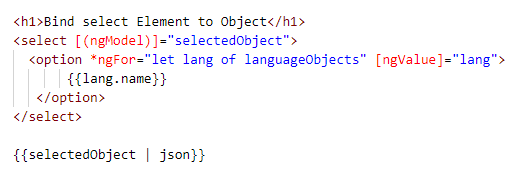
In component ts file added a variable selectedObject which of object language and will bind it to select element using [ngModel].
And another variable languageObjects which contains list of objects which is used to display select options using [ngValue].
<h1>Bind select Element to Object</h1>
<select [(ngModel)]="selectedObject">
  <option *ngFor="let lang of languageObjects" [ngValue]="lang">
       {{lang.name}}
   </option>
</select>

{{selectedObject | json}}
Now the selectedObject contains language object itself.
And we can display it using json pipe as shown below.
I will explain how to create an Angular 7 app with a simple “Hello World” example. This hello world example work in Angular 4,Angular 5,Angular 6,Angular7.
Let us start with Angular Hello World example to know the basics of Angular 7.
Before reading further, please go through my previous tutorial on how to setup local development environment for Angular.
We will use Angular CLI as mentioned in the above tutorial to create our Angular application.
Here are the steps to create first hello world application in Angular 7
Table of Contents
Creating First Angular 7 Hello World Example
We create a project called Hello World in Angular 7.
I recommend you to create a folder in your local disk so that all Angular examples are one place.(For instance create a folder named AngularExamples).
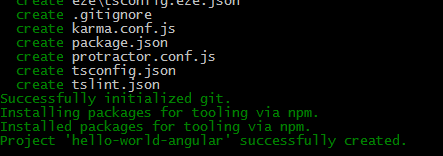
Open command prompt navigate to created folder; use the ng new command (Angular CLI) to create a new Angular project from scratch.
ng new hello-world-angular
It will take some time to create new project.
If you are using latest version of Angular CLI by default it uses Angular 7 (i.e., latest angular version). And there is no much difference between Angular 2 or Angular 4 or other versions it’s just an update. Please go through the following article to know more about this versioning of Angular.
If you know java or C# it is easy to understand but do not worry, we will understand each line one by one.
Here we are declaring a class named “HelloWorldComponent” which is a component.
Importing Dependencies in Component in Angular 7
First line tells the compiler that import “Component” and “OnInit” objects from @angular/core (node module installed when we created project via Angular CLI).
Component Decorators in Angular 7
After importing Component object, we have to tell the compiler that this class is a Component.
In Angular 7 (or Angular) we will use Decorators in typescript to do this. So Decorators are nothing but metadata added to our code.
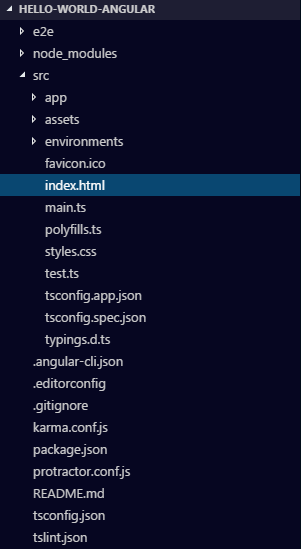
For example in \hello-world-angular\src\app\app-module.ts file, Decorator tells that it is a class named “AppModule” which is a Module (NgModule).
Selector property indicates the tag name we are going to use in DOM.
<app-hello-world></app-hello-world >
(While creating component we gave name as “hello-world” Angular CLI added app as prefix).
TemplateUrl in Angular 7 Component
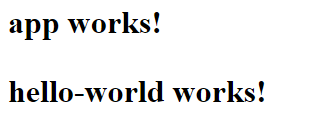
<app-hello-world> tag uses hello-world.component.html file as html template. So whenever we use <app-hello-world></app-hello-world> it will display the contents of file HTML located in
We have rendered static template, now we will add some data to the component.
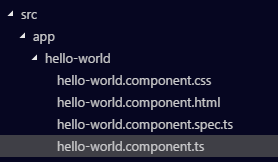
Open “hello-world.component.ts” file in editor.
And add the name property as shown below.
name:string;
We are declaring a property or variable named “name” which is a string type. This is similar to declaration of variables in object-oriented languages. If we assign any type other than string the compiler will throw error.
In constructor we will assign name variable. Constructor will be called whenever we create a new instance of a class. Similar to C# or Java language.
Rendering Angular 7 template
Now we have to use the declared variable in our template file i.e., HTML file. We have to use two curley brackets to display the value of variable {{ }}. We will call them template tags.
To use the name variable open the template file hello-world.component.html
<p>

hello-world works!
{{name}}

</p>
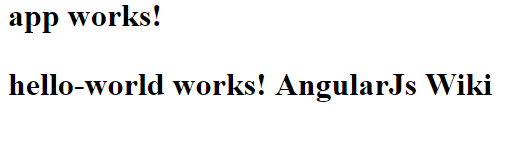
As the template bind to component(hello-world component) whenever compiler encounters flower brackets(i.e., template tags) it will replace the text with bounded property (i.e., name) value i.e., ”Angular Js Wiki”.
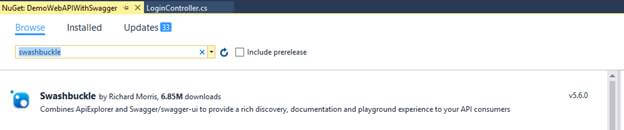
Once the controller had been created, now it's time to add Swagger into our project, for that we need to add a NuGet Package – Swashbuckle.
Once you have installed Swashbuckle to your project you can find a SwaggerConfig file in App_Start.
By default Swagger does not show XML Comments, there is an option to display them with Swagger UI, but for that, we need to make sure, when the project is built all the XML comments get saved into the XML file. For that, first, go to project properties. In the Build Section check > XML documentation file, you will then get a path. Mine is bin\DemoWebAPIWithSwagger.XML
Save it with Ctrl + S,
Now, go to SwaggerConfig file shown above, here search for c.IncludeXmlComments(GetXmlCommentsPath()) and uncomment it. Now
you can generate the method using intellisense or you can write a method on the end of the config file.
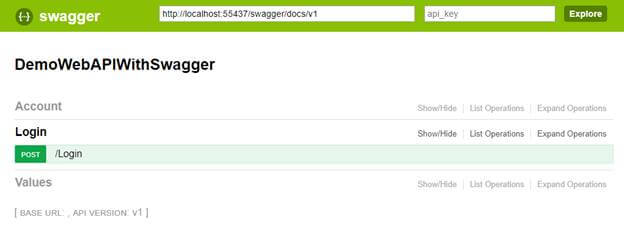
We are all done now... Let’s run our project. AFter page opens Add /Swagger in url = > http://localhost:5543/swagger
Now you will get a page like this
ou can find our Swagger UI Here,
ASP.Net Web API 2 CORS Support:
Enabling Cross Origin Resource Sharing in ASP.Net Web API 2 is simple, once it is enabled any client sending AJAX requests from webpage (on a different domain) to our API will be accepted.
By default CORS assembly doesn’t exist within ASP.NET Web API 2 assemblies so we need install it from NuGet, so open your NuGet package console, and type the following Install-PackageMicrosoft.AspNet.WebApi.Cors-Version5.0.0 once the package is installed open “WebApiConfig” class and add the following line of code inside the register method config.EnableCors(); by doing this we didn’t enable CORS yet, there are different levels to enable CORS on ASP.Net Web API, levels are:
1. On controller level
You can now add attribute named EnableCors on the entire controller so by default every action on this controller will support CORS as well, to do this open file “CoursesController” and add the highlighted line of code below:
1
2
3
4
5
6
[RoutePrefix("api/courses")]
[EnableCors("*","*","GET,POST")]
publicclassCoursesController:ApiController
{
//Rest of implementation is here
}
The EnableCors attribute accept 3 parameters, in the first one you can specify the origin of the domain where requests coming from, so if you want to allow only domain www.example.com to send requests for your API; then you specify this explicitly in this parameter, most of the cases you need to allow * which means all requests are accepted from any origin. In the second parameter you can specify if you need a certain header to be included in each request, so you can force consumers to send this header along with each request, in our case we will use * as well. The third parameter is used to specify which HTTP verbs this controller accepts, you can put * as well, but in our case we want to allow only GET and POST verbs to be called from requests coming from different origin.
In case you want to exclude a certain action in the controller from CORS support you can add the attribute DisableCors to this action, let we assume we want to disable CORS support on method GetCourse so the code to disable CORS support on this action will be as the below:
1
2
3
4
5
6
[Route("{id:int}")]
[DisableCors()]
publicIHttpActionResult GetCourse(intid)
{
//Rest of implementation is here
}
2. On action level
Enabling CORS on certain actions is fairly simple, all you want to do is adding the attribute EnableCors on this action, as well EnableCors accepts the same 3 parameters we discussed earlier. Enabling it on action level will be as the below code:
In some situations where you have many controllers and you want to allow CORS on your entire API, it is not convenient to visit each controller and add EanbleCors attribute to it, in this situation we can allow it on the entire API inside the Register method in Class WebApiConfig, so open your WebApiConfig class and add the code below:
By adding this we enabled CORS support for every controller we have in our API, still you can disable CORS support on selected actions by adding DisableCors attribute on action level.